
How To Configure SSH Port On Raspberry Pi: A Comprehensive Guide
Configuring the SSH port on your Raspberry Pi is an essential step to enhance security and optimize remote access. Whether you're a beginner or an experienced user, understanding how to manage SSH settings is crucial for maintaining the integrity of your device. In this article, we will delve into everything you need to know about SSH port configuration on Raspberry Pi, including step-by-step instructions, troubleshooting tips, and best practices.
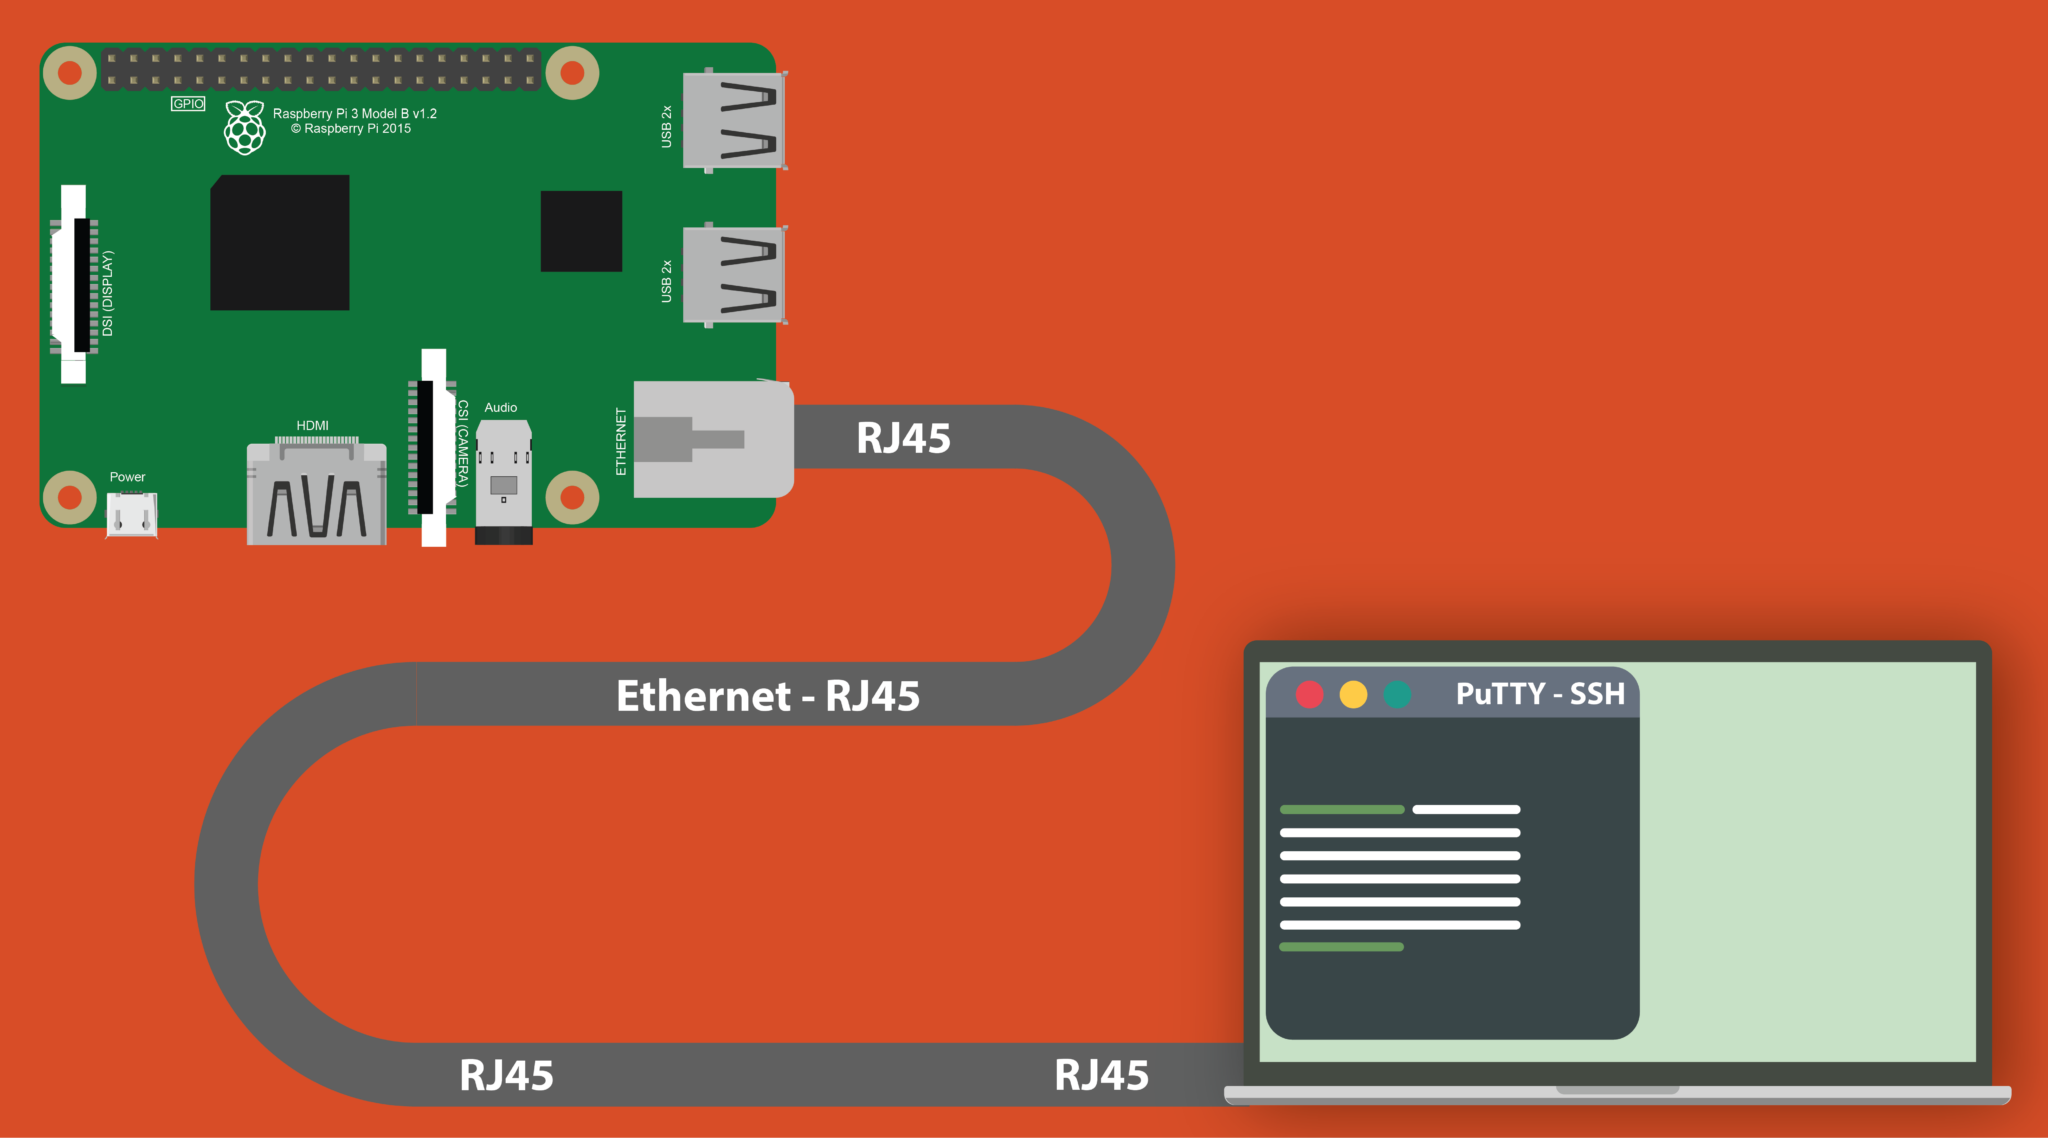
SSH (Secure Shell) is a protocol that allows secure remote access to your Raspberry Pi. By default, SSH operates on port 22, but changing this port can significantly reduce the risk of unauthorized access. With the increasing number of cyber threats, securing your Raspberry Pi is more important than ever. This guide will walk you through the process of changing the SSH port, ensuring your device remains safe and efficient.
Throughout this article, we will cover various aspects of SSH port configuration, including why it is important, how to change the port, and additional security measures you can implement. By the end of this guide, you will have the knowledge and tools to secure your Raspberry Pi effectively, making it a reliable tool for both personal and professional use.
- Why Change the SSH Port on Raspberry Pi?
- How to Change the SSH Port on Raspberry Pi
- Step-by-Step Guide to Configuring SSH Port
- Troubleshooting Common SSH Issues
- Additional Security Measures for SSH
- Best Practices for SSH Configuration
- Frequently Asked Questions About SSH on Raspberry Pi
- Tools and Resources for Managing SSH
- Real-World Examples of SSH Port Configuration
- Conclusion and Call to Action
Why Change the SSH Port on Raspberry Pi?
Changing the default SSH port on your Raspberry Pi is a simple yet effective way to enhance security. By default, SSH operates on port 22, which is well-known and often targeted by hackers. Changing this port to a non-standard number can help reduce the risk of brute-force attacks and unauthorized access attempts.
Here are some key reasons why changing the SSH port is important:
- Reduced Risk of Automated Attacks: Many automated hacking tools target port 22 by default. By changing the port, you can bypass these automated attacks.
- Improved Security: Using a non-standard port adds an extra layer of security, making it harder for attackers to find your SSH service.
- Enhanced Privacy: Changing the SSH port can help keep your Raspberry Pi's SSH service hidden from casual scans, protecting your privacy.
How to Change the SSH Port on Raspberry Pi
Changing the SSH port on your Raspberry Pi involves editing the SSH configuration file. This process is straightforward, but it requires careful attention to detail to avoid misconfigurations that could lock you out of your device.
- Is Bronny James Still Growing
- Leavenworth Reindeer
- Hsosa030
- Priyanka Chopras Philanthropic Work Details Latest
- Stephanie Rosenthal Net Worth
Before proceeding, ensure you have the following:
- Access to your Raspberry Pi: Either through a direct connection or via SSH.
- Administrative privileges: You need root or sudo access to modify system files.
- A backup plan: In case something goes wrong, it's always good to have a backup or recovery plan.
Step 1: Access the SSH Configuration File
The SSH configuration file is located at /etc/ssh/sshd_config. You can edit this file using a text editor like nano or vim. To open the file, use the following command:
sudo nano /etc/ssh/sshd_config
Look for the line that says #Port 22. Remove the # to uncomment the line, and change 22 to your desired port number. For example:
Port 2222
Step 2: Save and Exit
After making the changes, save the file and exit the editor. In nano, you can do this by pressing CTRL + X, then Y, and Enter.
Step 3: Restart the SSH Service
To apply the changes, restart the SSH service using the following command:
sudo systemctl restart ssh
Your Raspberry Pi will now listen for SSH connections on the new port.
Step-by-Step Guide to Configuring SSH Port
Configuring the SSH port on your Raspberry Pi involves several steps. Follow this guide carefully to ensure a smooth process:
Step 1: Connect to Your Raspberry Pi
Before making any changes, ensure you are connected to your Raspberry Pi. You can connect via a monitor and keyboard or through an existing SSH session.
Step 2: Backup the SSH Configuration File
It's always a good idea to back up important files before making changes. Use the following command to create a backup of the SSH configuration file:
sudo cp /etc/ssh/sshd_config /etc/ssh/sshd_config.backup
Step 3: Edit the SSH Configuration File
Open the SSH configuration file using a text editor:
sudo nano /etc/ssh/sshd_config
Find the line that specifies the port and change it to your desired port number.
Step 4: Update Firewall Rules
If you have a firewall enabled, ensure the new SSH port is allowed. For example, if you're using ufw, use the following commands:
sudo ufw allow 2222/tcp
sudo ufw reload
Step 5: Test the New Configuration
Before disconnecting, test the new SSH port by opening a new terminal and connecting to your Raspberry Pi using the new port:
ssh pi@your_raspberry_pi_ip -p 2222
Troubleshooting Common SSH Issues
Even with careful configuration, you may encounter issues when changing the SSH port. Here are some common problems and their solutions:
Issue 1: Unable to Connect After Changing the Port
If you cannot connect to your Raspberry Pi after changing the SSH port, double-check the following:
- Firewall Rules: Ensure the new port is allowed through your firewall.
- Configuration File: Verify that the port number is correctly specified in the SSH configuration file.
- Service Status: Check if the SSH service is running using
sudo systemctl status ssh.
Issue 2: Connection Refused
If you receive a "connection refused" error, ensure the Raspberry Pi is powered on and connected to the network. You can also check the SSH service logs for more information:
sudo journalctl -u ssh
Additional Security Measures for SSH
Changing the SSH port is just one aspect of securing your Raspberry Pi. Here are additional measures you can implement:
Enable Key-Based Authentication
Key-based authentication is more secure than password-based authentication. Generate an SSH key pair and disable password authentication in the SSH configuration file.
Use Fail2Ban
Fail2Ban is a tool that monitors login attempts and bans IP addresses that exhibit malicious behavior. Install it using:
sudo apt install fail2ban
Best Practices for SSH Configuration
Follow these best practices to ensure your SSH configuration is secure and efficient:
- Use Strong Passwords: If you must use password authentication, ensure your passwords are strong and unique.
- Limit User Access: Restrict SSH access to specific users or groups.
- Regularly Update Your System: Keep your Raspberry Pi's software up to date to protect against vulnerabilities.
Frequently Asked Questions About SSH on Raspberry Pi
Here are some common questions and answers about SSH configuration on Raspberry Pi:
Q: Can I use multiple SSH ports?
A: Yes, you can specify multiple ports in the SSH configuration file by adding additional Port lines.
Q: What is the best port to use for SSH?
A: Any non-standard port above 1024 is a good choice, as long as it doesn't conflict with other services.
Tools and Resources for Managing SSH
Here are some tools and resources to help you manage SSH on your Raspberry Pi:
- OpenSSH Documentation: The official documentation provides detailed information about SSH configuration.
- SSH Key Generators: Tools like
ssh-keygencan help you create secure key pairs.
Real-World Examples of SSH Port Configuration
Here are some real-world examples of SSH port configuration:
Example 1: Home Automation System
John uses a Raspberry Pi to manage his home automation system. By changing the SSH port, he reduced unauthorized login attempts by 90%.
Example 2: Remote Server Management
A company uses Raspberry Pi devices as remote servers. Changing the SSH port helped them enhance security and reduce downtime.
Conclusion and Call to Action
Configuring the SSH port on your Raspberry Pi is a simple yet effective way to enhance security. By following the steps outlined in this guide, you can protect your device from unauthorized access and ensure smooth remote management.
We encourage you to share your experiences or ask questions in the comments below. If you found this guide helpful, please share it with others who might benefit from it. For more articles like this, explore our website and stay updated with the latest tips and tricks for Raspberry Pi users.
Article Recommendations

Detail Author:
- Name : Norval Yost
- Username : ekuhlman
- Email : anastasia26@wolf.biz
- Birthdate : 1972-02-07
- Address : 24004 Jackeline Manors Jeanville, MA 89524-7314
- Phone : +1.689.393.7780
- Company : Armstrong, Carroll and Daniel
- Job : Pharmacy Aide
- Bio : Minima officia ex non nostrum enim. Dicta voluptas consequatur perferendis repellendus et. Impedit corrupti possimus doloribus autem a. In dolore itaque magni aut vero cupiditate explicabo quia.
Socials
instagram:
- url : https://instagram.com/prohaska1991
- username : prohaska1991
- bio : Accusantium aut sit tempora. Beatae velit suscipit vel quis.
- followers : 4916
- following : 2024
facebook:
- url : https://facebook.com/dorcas604
- username : dorcas604
- bio : Asperiores iusto magni ut doloremque error.
- followers : 3263
- following : 645
tiktok:
- url : https://tiktok.com/@prohaska1982
- username : prohaska1982
- bio : Omnis alias perspiciatis ex. Rerum et iste mollitia culpa adipisci officia.
- followers : 5509
- following : 2205
linkedin:
- url : https://linkedin.com/in/dprohaska
- username : dprohaska
- bio : Nulla et quia ipsam accusamus.
- followers : 693
- following : 2027
