
How To Fix Remote Access Raspberry Pi SSH Over The Internet Not Working
Are you struggling to access your Raspberry Pi remotely via SSH over the internet? You're not alone. Many users face challenges when trying to establish a secure connection to their Raspberry Pi from outside their local network. This issue can be frustrating, especially if you rely on your Raspberry Pi for remote projects, automation, or server management. In this comprehensive guide, we’ll walk you through everything you need to know to troubleshoot and resolve the problem.
SSH (Secure Shell) is a powerful tool that allows you to remotely control your Raspberry Pi from any device with an internet connection. However, when SSH over the internet fails, it can disrupt your workflow and leave you searching for answers. This article will address common causes of SSH connection failures, provide step-by-step troubleshooting tips, and offer expert advice to ensure your Raspberry Pi remains accessible and secure.
Whether you're a beginner or an experienced Raspberry Pi user, this guide is designed to help you overcome the obstacles preventing remote access. By the end of this article, you’ll have a clear understanding of the problem and actionable solutions to get your SSH connection up and running again. Let’s dive in!
Table of Contents
- Understanding SSH and Its Importance
- Common Issues with Remote SSH Access
- Step-by-Step Troubleshooting Guide
- Setting Up Port Forwarding on Your Router
- Using Dynamic DNS for Remote Access
- Configuring Firewall Settings for SSH
- Best Practices for Secure Remote Access
- Alternative Methods for Remote Access
- Essential Tools and Resources
- Conclusion and Next Steps
Understanding SSH and Its Importance
SSH, or Secure Shell, is a cryptographic network protocol used to securely access and manage devices over an unsecured network. It is widely used by developers, system administrators, and hobbyists to remotely control servers, computers, and devices like the Raspberry Pi. SSH encrypts all data transmitted between your device and the Raspberry Pi, ensuring that sensitive information remains protected from unauthorized access.
When it comes to remote access, SSH is often the preferred method due to its simplicity and security. By enabling SSH on your Raspberry Pi, you can execute commands, transfer files, and manage your device from anywhere in the world. However, accessing your Raspberry Pi over the internet introduces additional complexities, such as configuring your router, setting up dynamic DNS, and ensuring proper firewall rules are in place.
Why Remote SSH Access Matters
Remote SSH access is essential for many Raspberry Pi projects, including:
- Where Was Junko Furuta Found
- Jenna Fischer Husband
- Morgan Holly Moore Latest
- Junku Furata
- Caitlin Clark Europe Stats
- Running a home automation server
- Hosting a personal website or blog
- Managing IoT devices
- Performing remote backups
Without reliable SSH access, these projects can become difficult to maintain, especially if you’re away from your local network.
Common Issues with Remote SSH Access
Before diving into solutions, it’s important to understand the common reasons why remote SSH access might fail. Below are some of the most frequent issues users encounter:
1. Incorrect Port Forwarding Configuration
One of the primary reasons SSH over the internet fails is improper port forwarding. By default, SSH uses port 22, but many users change this to a custom port for security reasons. If your router isn’t configured to forward traffic from the internet to your Raspberry Pi’s IP address and port, your SSH connection will fail.
2. Dynamic IP Address Changes
Most home internet connections use dynamic IP addresses, which means your public IP address can change periodically. If your IP address changes and you haven’t set up a dynamic DNS service, you won’t be able to connect to your Raspberry Pi remotely.
3. Firewall Restrictions
Firewalls on your router or Raspberry Pi can block incoming SSH connections. If the necessary ports aren’t open, your connection attempts will be denied.
4. ISP Restrictions
Some internet service providers (ISPs) block certain ports, including the default SSH port (22). This can prevent you from accessing your Raspberry Pi unless you configure SSH to use a different port.
5. Misconfigured SSH Settings
If SSH isn’t properly enabled on your Raspberry Pi or if there are errors in the configuration file, remote access won’t work. Double-checking your SSH settings is crucial for resolving connectivity issues.
Step-by-Step Troubleshooting Guide
Now that you’re familiar with the common issues, let’s walk through a step-by-step process to troubleshoot and fix remote SSH access problems.
Step 1: Verify SSH is Enabled on Your Raspberry Pi
The first step is to ensure that SSH is enabled on your Raspberry Pi. You can do this by:
- Using the Raspberry Pi Configuration tool: Go to
Preferences > Raspberry Pi Configuration > Interfacesand enable SSH. - Creating an empty file named
sshin the boot partition of your SD card.
Step 2: Check Your Raspberry Pi’s Local IP Address
To establish a connection, you need to know your Raspberry Pi’s local IP address. You can find this by running the command:
hostname -IStep 3: Test SSH Access on Your Local Network
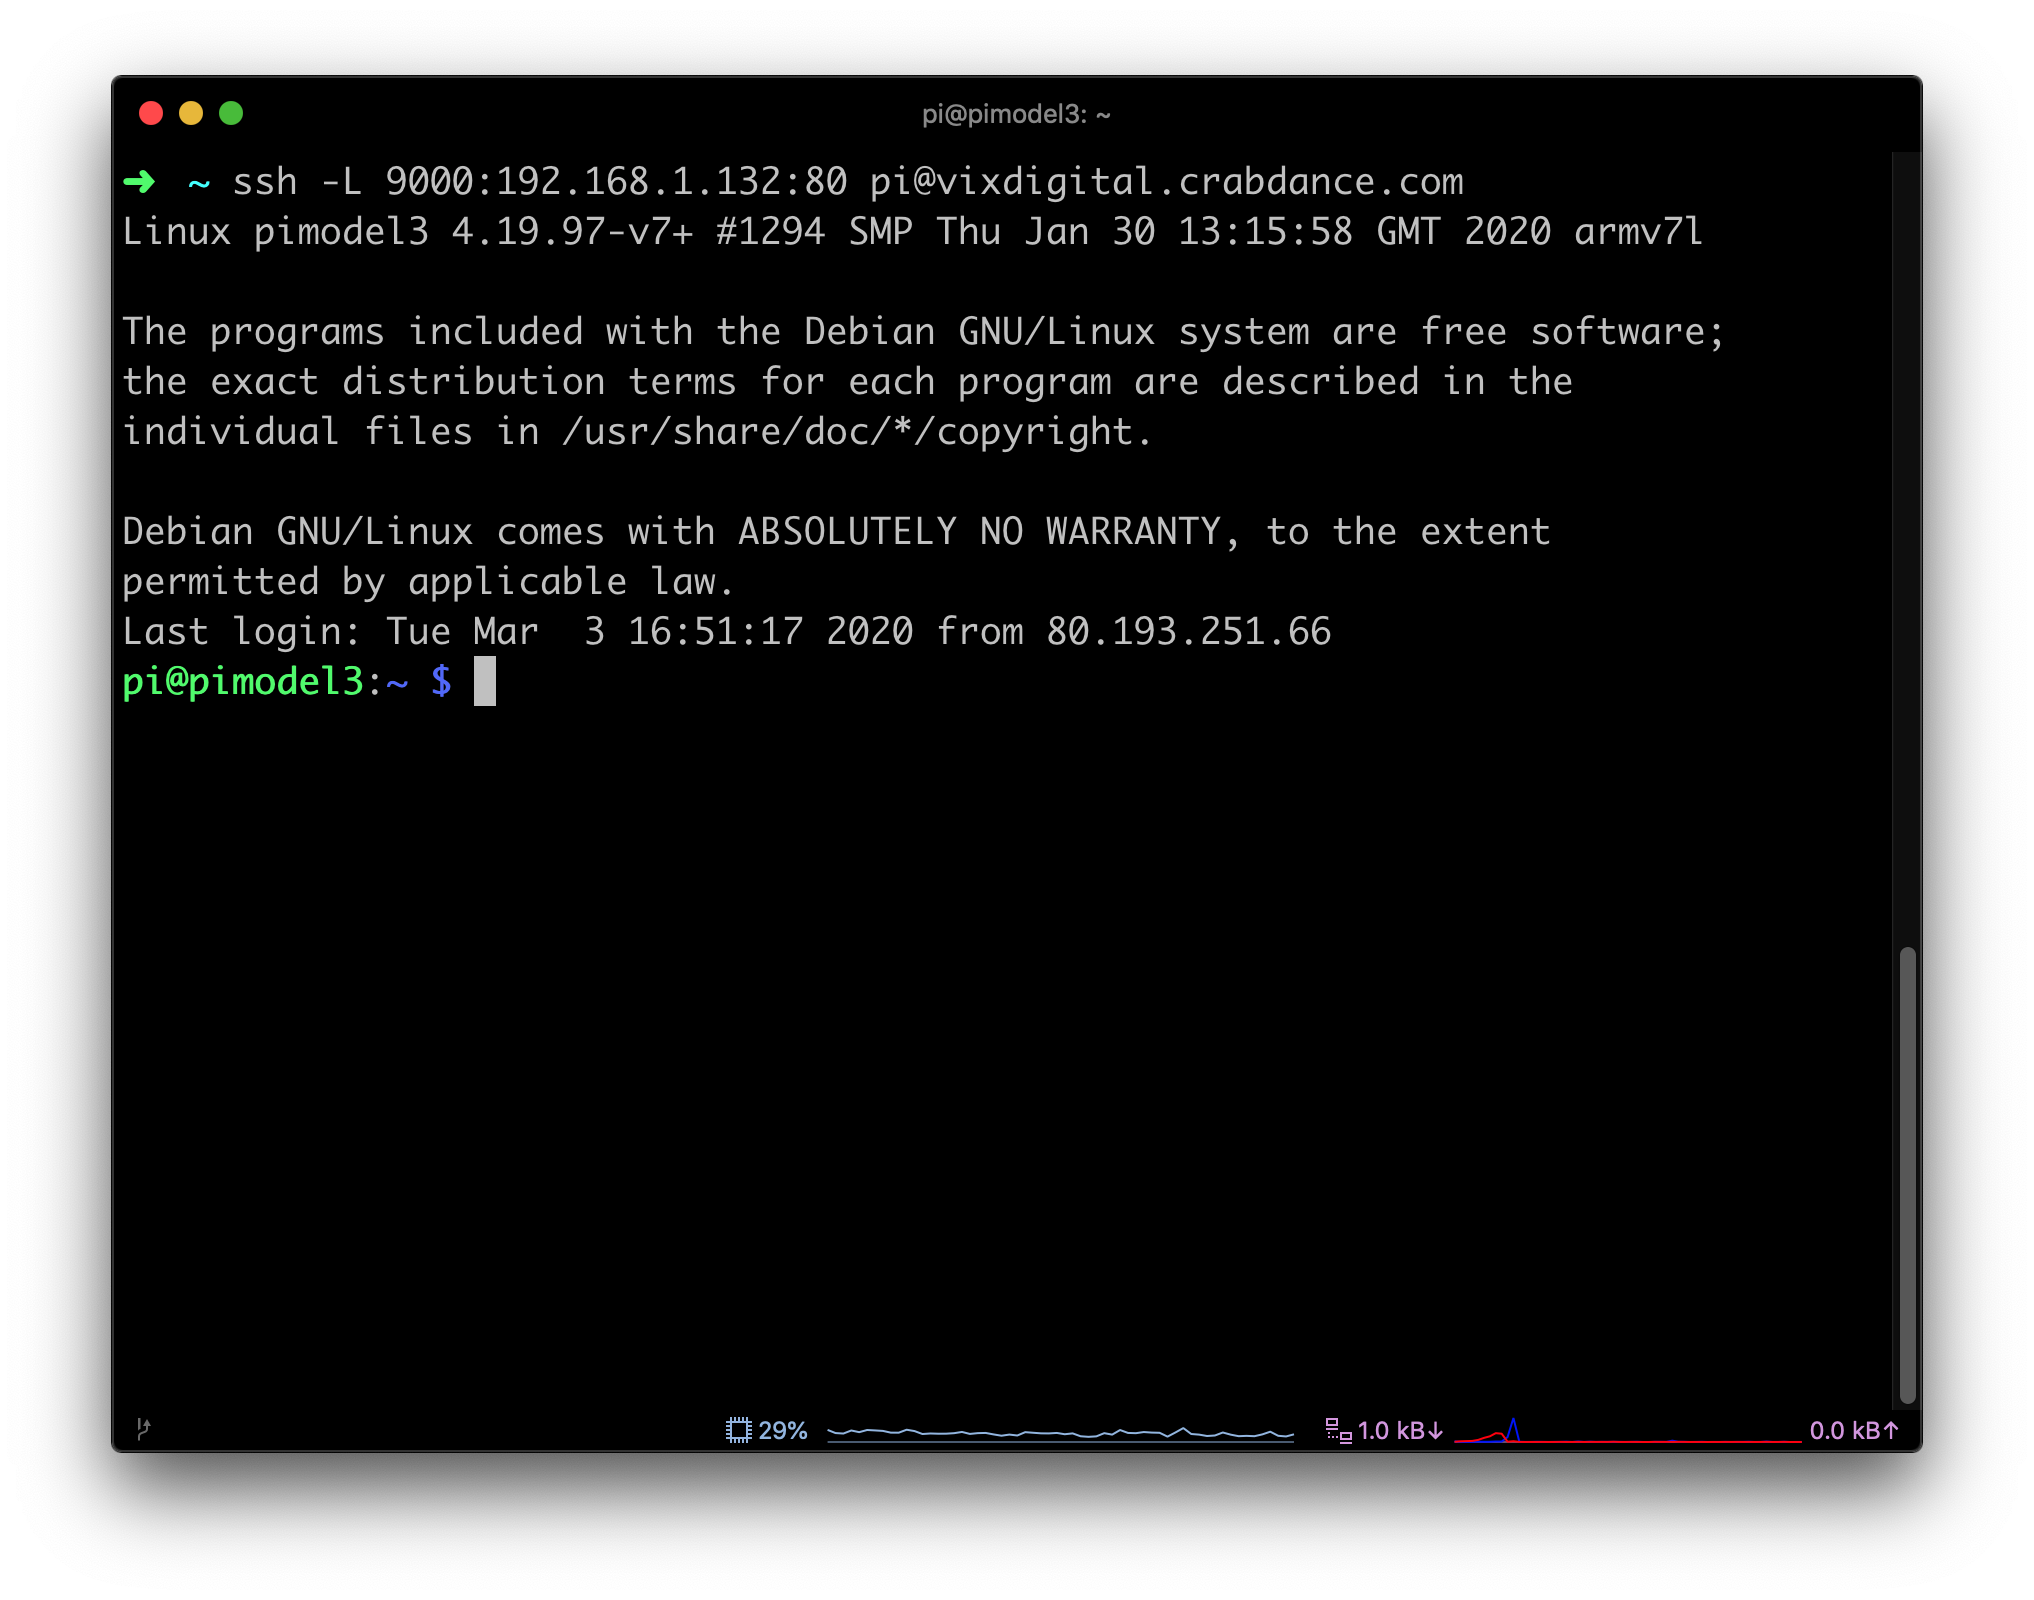
Before attempting remote access, test SSH on your local network using:
ssh pi@Replace
Step 4: Configure Port Forwarding on Your Router
Port forwarding allows external traffic to reach your Raspberry Pi. Follow these steps:
- Access your router’s admin panel (usually via
192.168.1.1). - Navigate to the port forwarding section.
- Create a new rule to forward external port 22 (or your custom port) to your Raspberry Pi’s local IP address.
Setting Up Port Forwarding on Your Router
Port forwarding is a critical step for enabling remote SSH access. Without it, your router won’t know where to direct incoming SSH traffic. Here’s a detailed guide to setting up port forwarding:
Step 1: Log In to Your Router
Access your router’s admin panel by entering its IP address in your web browser. Common router IPs include 192.168.1.1 or 192.168.0.1.
Step 2: Locate the Port Forwarding Section
The location of the port forwarding settings varies depending on your router model. Look for sections labeled “Port Forwarding,” “NAT,” or “Virtual Servers.”
Step 3: Add a New Port Forwarding Rule
Create a new rule with the following details:
- External Port: 22 (or your custom port)
- Internal IP Address: Your Raspberry Pi’s local IP
- Internal Port: 22 (or your custom port)
- Protocol: TCP
Using Dynamic DNS for Remote Access
Dynamic DNS (DDNS) is a service that maps a domain name to your changing public IP address. This is particularly useful if your ISP assigns dynamic IPs. Popular DDNS providers include:
- No-IP
- DuckDNS
- FreeDNS
How to Set Up Dynamic DNS
Follow these steps to configure DDNS:
- Sign up for a DDNS service.
- Install the DDNS client on your Raspberry Pi or router.
- Update your router’s DDNS settings with your chosen provider’s credentials.
Configuring Firewall Settings for SSH
Firewalls can block SSH traffic, so it’s important to configure them correctly. Here’s how to adjust firewall settings:
On Your Raspberry Pi
Use the ufw (Uncomplicated Firewall) tool to allow SSH:
sudo ufw allow sshOn Your Router
Ensure that your router’s firewall allows traffic on the SSH port you’ve configured.
Best Practices for Secure Remote Access
While enabling remote SSH access is convenient, it’s crucial to prioritize security. Here are some tips:
- Use strong passwords or SSH keys for authentication.
- Change the default SSH port to reduce the risk of brute-force attacks.
- Disable password authentication and rely solely on SSH keys.
- Regularly update your Raspberry Pi’s operating system and software.
Alternative Methods for Remote Access
If SSH over the internet isn’t working despite your efforts, consider these alternatives:
- Using a reverse SSH tunnel
- Leveraging cloud-based services like ngrok
- Setting up a virtual private network (VPN)
Essential Tools and Resources
Here are some tools and resources to help you troubleshoot and enhance your Raspberry Pi’s remote access:
Conclusion and Next Steps
Remote access to your Raspberry Pi via SSH is a valuable skill that opens up endless possibilities for remote management and automation. By following the troubleshooting steps outlined in this guide, you should be able to resolve issues preventing SSH access over the internet. Remember to prioritize security by using strong authentication methods and keeping your system updated.
If you found this guide helpful, please share it with others who might benefit. Additionally, feel free to leave a comment below with your experiences or questions. For more tutorials and resources, explore our other articles on Raspberry Pi and remote access technologies. Happy tinkering!
Article Recommendations
- Caitlin Clark Europe Stats
- Felix Drug Lord
- Remote Iot P2p Download
- Jenna Fischer Husband
- Ophiuchus And Pisces Compatibility

Detail Author:
- Name : Mr. Mervin Corwin I
- Username : mozell64
- Email : vandervort.aaliyah@cartwright.info
- Birthdate : 1991-02-12
- Address : 545 Evalyn Cape Carrollside, AZ 03936
- Phone : +14322192274
- Company : Hodkiewicz Group
- Job : Public Transportation Inspector
- Bio : Autem totam at quis dolorem ut ullam aut. Laudantium qui ex hic qui error enim. Nulla ab rerum iure blanditiis aut praesentium debitis. Et sapiente quis quos qui sapiente est.
Socials
linkedin:
- url : https://linkedin.com/in/areilly
- username : areilly
- bio : Quos aliquid nisi at sit et.
- followers : 4423
- following : 2281
tiktok:
- url : https://tiktok.com/@reilly1988
- username : reilly1988
- bio : Saepe cum dolorem consectetur omnis qui eum sit.
- followers : 879
- following : 1358
