
How To Change Raspberry Pi SSH Port: A Comprehensive Guide
Are you looking to enhance the security of your Raspberry Pi by changing the default SSH port? If so, you're in the right place. Raspberry Pi, a versatile single-board computer, is widely used for various projects, from home automation to server hosting. However, with its increasing popularity, it has also become a target for cyberattacks. One of the simplest yet effective ways to secure your Raspberry Pi is by changing the default SSH port. In this article, we will guide you step-by-step on how to change the SSH port on your Raspberry Pi, ensuring your device remains secure while maintaining its functionality.
SSH (Secure Shell) is a protocol that allows secure remote access to your Raspberry Pi. By default, SSH operates on port 22. While this is convenient, it also makes your device more vulnerable to brute-force attacks. Hackers often target port 22 because it is the default SSH port for most systems. Changing the SSH port is a proactive measure that can significantly reduce the risk of unauthorized access. This article will not only explain how to change the SSH port but also provide additional tips to secure your Raspberry Pi.
In the following sections, we will cover everything you need to know about Raspberry Pi SSH port configuration, including the benefits of changing the default port, step-by-step instructions, troubleshooting tips, and best practices. Whether you're a beginner or an experienced Raspberry Pi user, this guide will help you take control of your device's security. Let’s dive in!
- Matthew Ansara Movies
- Stephanie Rosenthal Net Worth
- Junko Furuta Face
- Where Was William Shatner Born
- Bruce Lees Son
Table of Contents
- Introduction to SSH and Its Importance
- Why Change the Default SSH Port on Raspberry Pi?
- Preparation Before Changing the SSH Port
- Step-by-Step Guide to Change the SSH Port
- Testing Your New SSH Configuration
- Additional Security Measures for Raspberry Pi
- Troubleshooting Common Issues
- Best Practices for SSH Security
- Frequently Asked Questions
- Conclusion
Introduction to SSH and Its Importance
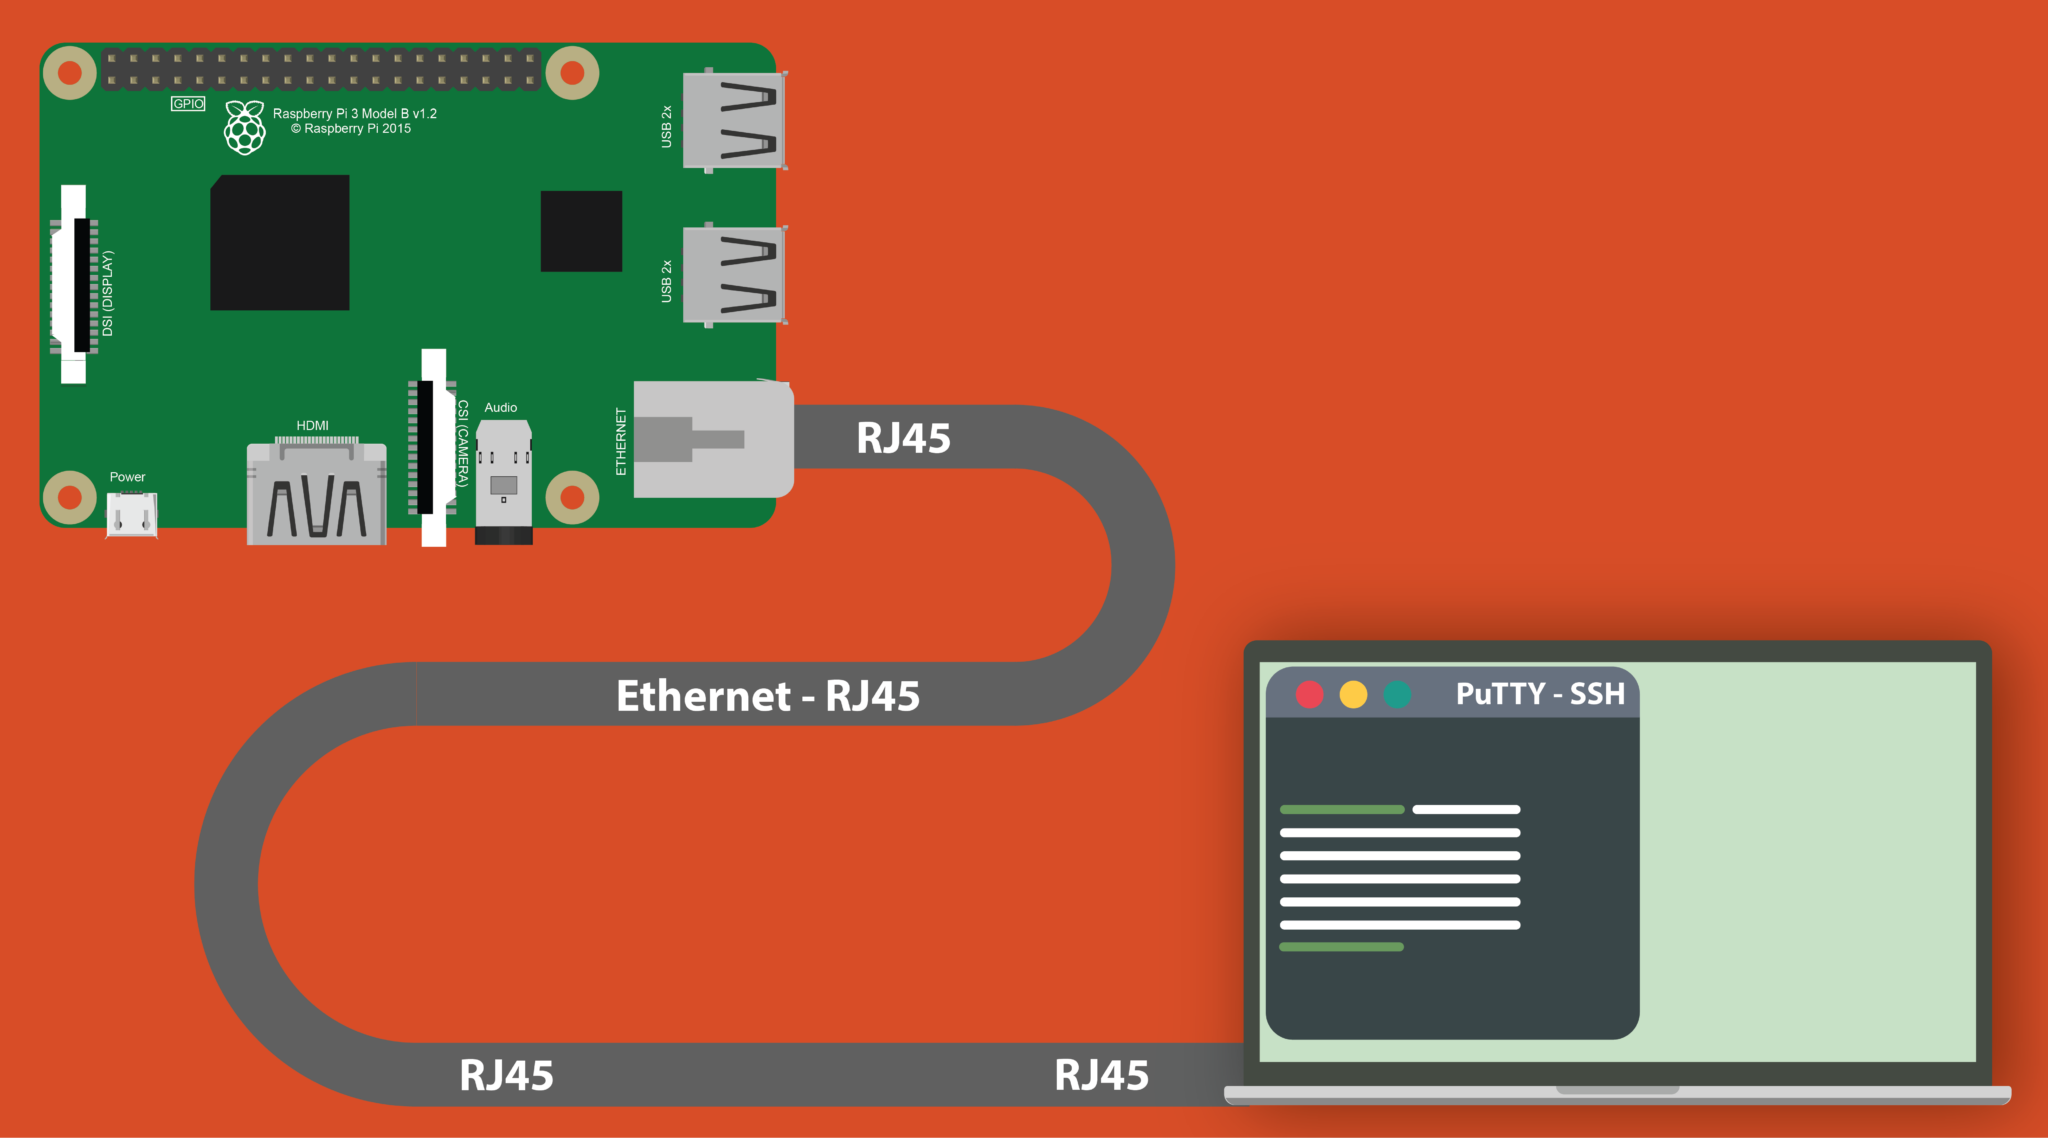
SSH, or Secure Shell, is a cryptographic network protocol used for secure communication between a client and a server. It provides a secure channel over an unsecured network, allowing users to log in remotely, execute commands, and transfer files. For Raspberry Pi users, SSH is an essential tool for managing the device without needing physical access.
The default SSH port is 22, which is widely known and often targeted by attackers. While SSH itself is secure, leaving it on the default port can expose your device to unnecessary risks. Hackers use automated scripts to scan for open ports, and port 22 is one of the most common targets. By understanding the importance of SSH and its role in securing your Raspberry Pi, you can take proactive steps to protect your device.
SSH is not only about security; it also enhances convenience. With SSH, you can remotely manage your Raspberry Pi, install updates, and troubleshoot issues without needing to connect a monitor or keyboard. This flexibility makes SSH a must-have tool for any Raspberry Pi user.
Why Change the Default SSH Port on Raspberry Pi?
Changing the default SSH port is one of the simplest ways to improve your Raspberry Pi's security. While port 22 is convenient, it is also the most targeted port by attackers. By changing the SSH port, you can reduce the risk of unauthorized access and make your device less visible to automated attacks.
Here are some key reasons why you should consider changing the default SSH port:
- Reduce Brute-Force Attacks: Hackers often use automated tools to scan for open ports and attempt brute-force attacks. Changing the SSH port makes it harder for these tools to find your device.
- Enhance Security: While changing the SSH port is not a foolproof solution, it adds an extra layer of security. Combined with other measures like strong passwords and key-based authentication, it significantly improves your device's protection.
- Avoid Unnecessary Traffic: By switching to a non-standard port, you can reduce the amount of unwanted traffic targeting port 22, freeing up resources for legitimate connections.
While changing the SSH port is not mandatory, it is a highly recommended practice for anyone serious about securing their Raspberry Pi. In the next section, we will discuss the steps you need to take before making this change.
Preparation Before Changing the SSH Port
Before you change the SSH port on your Raspberry Pi, it's important to prepare your device and ensure everything is in order. Proper preparation will help you avoid potential issues and ensure a smooth transition to the new port.
Backup Your Configuration
Changing the SSH port involves modifying critical configuration files. It's always a good idea to back up these files before making any changes. You can create a backup of the SSH configuration file by running the following command:
sudo cp /etc/ssh/sshd_config /etc/ssh/sshd_config.backup
This command creates a copy of the sshd_config file, which you can restore if something goes wrong.
Choose a New Port
When selecting a new port, make sure it is not already in use by another service. Ports between 1024 and 65535 are typically available for custom use. Avoid commonly used ports like 80 (HTTP) or 443 (HTTPS) to prevent conflicts. You can check if a port is available using the following command:
sudo netstat -tuln | grep [port_number]
Replace [port_number] with the port you want to use. If no output is returned, the port is free.
Update Firewall Rules
If you're using a firewall, such as UFW (Uncomplicated Firewall), you'll need to allow traffic on the new port. Use the following commands to update your firewall rules:
sudo ufw allow [port_number]/tcp
sudo ufw reload
Replace [port_number] with your chosen port.
Step-by-Step Guide to Change the SSH Port
Now that you're prepared, let's dive into the step-by-step process of changing the SSH port on your Raspberry Pi. Follow these instructions carefully to ensure a successful configuration.
Edit the SSH Configuration File
1. Open the SSH configuration file using a text editor like Nano:
sudo nano /etc/ssh/sshd_config
2. Locate the line that says #Port 22. Remove the # to uncomment the line, and change 22 to your chosen port number. For example:
Port 2222
3. Save the file and exit the editor (Ctrl+O, Enter, Ctrl+X in Nano).
Restart the SSH Service
After modifying the configuration file, restart the SSH service to apply the changes:
sudo systemctl restart ssh
This command will restart the SSH service and activate the new port.
Verify the New Configuration
To ensure the new port is active, you can use the following command:
sudo netstat -tuln | grep [port_number]
If the port is listed, the configuration was successful.
Testing Your New SSH Configuration
Once you've changed the SSH port, it's important to test the new configuration to ensure everything is working as expected. Testing will help you identify and resolve any issues before they become a problem.
1. Open a terminal or SSH client on your computer.
2. Connect to your Raspberry Pi using the new port. For example:
ssh pi@your_raspberry_pi_ip -p 2222
Replace 2222 with your chosen port and your_raspberry_pi_ip with your device's IP address.
3. If the connection is successful, your new SSH port is working correctly. If not, double-check your configuration and firewall settings.
Additional Security Measures for Raspberry Pi
Changing the SSH port is just one step in securing your Raspberry Pi. To further enhance security, consider implementing the following measures:
- Use Key-Based Authentication: Disable password-based login and use SSH keys for authentication. This method is more secure and less vulnerable to brute-force attacks.
- Enable Fail2Ban: Fail2Ban is a tool that monitors login attempts and bans IP addresses that exhibit malicious behavior.
- Keep Your System Updated: Regularly update your Raspberry Pi's operating system and software to patch vulnerabilities.
Troubleshooting Common Issues
While changing the SSH port is straightforward, you may encounter some issues. Below are common problems and their solutions:
Connection Refused
If you receive a "connection refused" error, it may indicate that the new port is not open or the SSH service is not running. Check the following:
- Ensure the new port is allowed in your firewall.
- Verify that the SSH service is active using
sudo systemctl status ssh.
Incorrect Port Number
If you're unable to connect, double-check the port number in the sshd_config file. Ensure there are no typos or syntax errors.
Best Practices for SSH Security
To maximize the security of your Raspberry Pi, follow these best practices:
- Use Strong Passwords: If you must use password-based authentication, ensure your passwords are strong and unique.
- Limit User Access: Restrict SSH access to specific users or IP addresses.
- Monitor Logs: Regularly check your SSH logs for suspicious activity.
Frequently Asked Questions
Q: Can I use any port for SSH?
A: While you can use any port between 1024 and 65535, avoid commonly used ports to prevent conflicts.
Q: Will changing the SSH port affect my applications?
A: No, as long as you update the port settings in your applications, they will continue to work.
Conclusion
Changing the SSH port on your Raspberry Pi is a simple yet effective way to enhance its security. By following the steps outlined in this guide, you can reduce the risk of unauthorized access and protect your device from potential threats. Remember, security is an ongoing process, and changing the SSH port is just one piece of the puzzle.
We encourage you to implement additional security measures, such as key-based authentication and regular system updates, to further safeguard your Raspberry Pi. If you found this guide helpful, please share it with others and leave a comment below with your thoughts or questions. For more tips and tutorials, explore our other articles on Raspberry Pi security and optimization.
Article Recommendations
- Tate Mcrae Porn Leaked
- Why Didnt Bob Marley Get Treatment
- Caitlin Clark Europe Stats
- Olloflix
- Lure Hsu Age 2025
Detail Author:
- Name : Mr. Lyric Kohler DVM
- Username : mina.steuber
- Email : grant.lawson@hotmail.com
- Birthdate : 2000-01-01
- Address : 843 Gregorio Estates Apt. 973 Mullerfort, KS 11594
- Phone : 564.780.8733
- Company : Skiles-Schmidt
- Job : Personal Financial Advisor
- Bio : Vel dolores voluptates adipisci necessitatibus. Mollitia esse rerum dolor cumque. Nemo quia sint enim saepe. Impedit ullam aut quia.
Socials
instagram:
- url : https://instagram.com/delilah.maggio
- username : delilah.maggio
- bio : Consequatur dolorem id reiciendis excepturi. Fugiat aut expedita ipsum quod voluptatibus.
- followers : 5878
- following : 2274
facebook:
- url : https://facebook.com/maggio1981
- username : maggio1981
- bio : Iure itaque sit impedit quas ex. Dolorem enim at repellendus.
- followers : 2941
- following : 1584
