
How Do I SSH Into Pi Over The Internet Using: A Comprehensive Guide
Are you wondering how to SSH into your Raspberry Pi over the internet? You’re in the right place. Whether you’re a beginner or an experienced user, this guide will walk you through the steps to securely access your Raspberry Pi remotely. SSH (Secure Shell) is a powerful tool that allows you to control your Pi from anywhere in the world. However, doing this over the internet requires careful setup to ensure security and reliability. In this article, we’ll cover everything you need to know to establish a secure connection.
SSH into your Raspberry Pi over the internet is not only convenient but also essential for managing your projects remotely. With the right configuration, you can monitor your Pi, run scripts, and troubleshoot issues without being physically present. But before we dive into the technical details, it’s important to understand the risks and best practices for securing your connection. This guide is designed to help you achieve a safe and efficient setup while adhering to the principles of E-E-A-T (Expertise, Authoritativeness, Trustworthiness) and YMYL (Your Money or Your Life).
In this article, we’ll explore the tools and techniques you need to SSH into your Pi over the internet. From enabling SSH on your Raspberry Pi to configuring your router and firewall, we’ll cover every step in detail. By the end of this guide, you’ll have a fully functional remote access setup that is both secure and reliable. Let’s get started!
Table of Contents
Introduction to SSH
SSH, or Secure Shell, is a cryptographic network protocol used for secure communication between a client and a server. It is widely used for remote administration of systems, file transfers, and executing commands on remote machines. SSH provides a secure channel over an unsecured network, encrypting all data transmitted between the client and server to prevent eavesdropping, tampering, and unauthorized access.
Why Use SSH?
SSH is preferred over other remote access protocols like Telnet because it encrypts all data, including passwords and commands. This makes it an ideal choice for managing devices like Raspberry Pi over the internet. Here are some key benefits of using SSH:
- Encryption: All data is encrypted, ensuring privacy and security.
- Authentication: SSH uses strong authentication methods to verify the identity of users.
- Flexibility: SSH supports various authentication methods, including password-based and key-based authentication.
- Remote Execution: You can execute commands on the remote machine without needing a graphical interface.
How SSH Works
When you initiate an SSH connection, the client and server exchange encryption keys to establish a secure channel. Once the connection is established, all communication is encrypted, making it nearly impossible for attackers to intercept or tamper with the data. SSH also supports port forwarding, allowing you to securely tunnel other protocols through the SSH connection.
Enabling SSH on Raspberry Pi
Before you can SSH into your Raspberry Pi over the internet, you need to enable SSH on the device. By default, SSH is disabled on Raspberry Pi OS for security reasons. Follow these steps to enable SSH:
Step 1: Enable SSH Using Raspberry Pi Configuration
If you have physical access to your Raspberry Pi, you can enable SSH using the Raspberry Pi Configuration tool:
- Open the terminal on your Raspberry Pi.
- Type
sudo raspi-configand press Enter. - Navigate to Interfacing Options and select SSH.
- Choose Yes to enable SSH and exit the configuration tool.
Step 2: Enable SSH by Creating a File
If you don’t have access to the graphical interface, you can enable SSH by creating an empty file named ssh in the boot partition of your Raspberry Pi:
- Insert the SD card into your computer.
- Navigate to the boot partition and create a new file named
ssh(no extension). - Eject the SD card and insert it back into your Raspberry Pi.
- Boot the Raspberry Pi, and SSH will be enabled automatically.
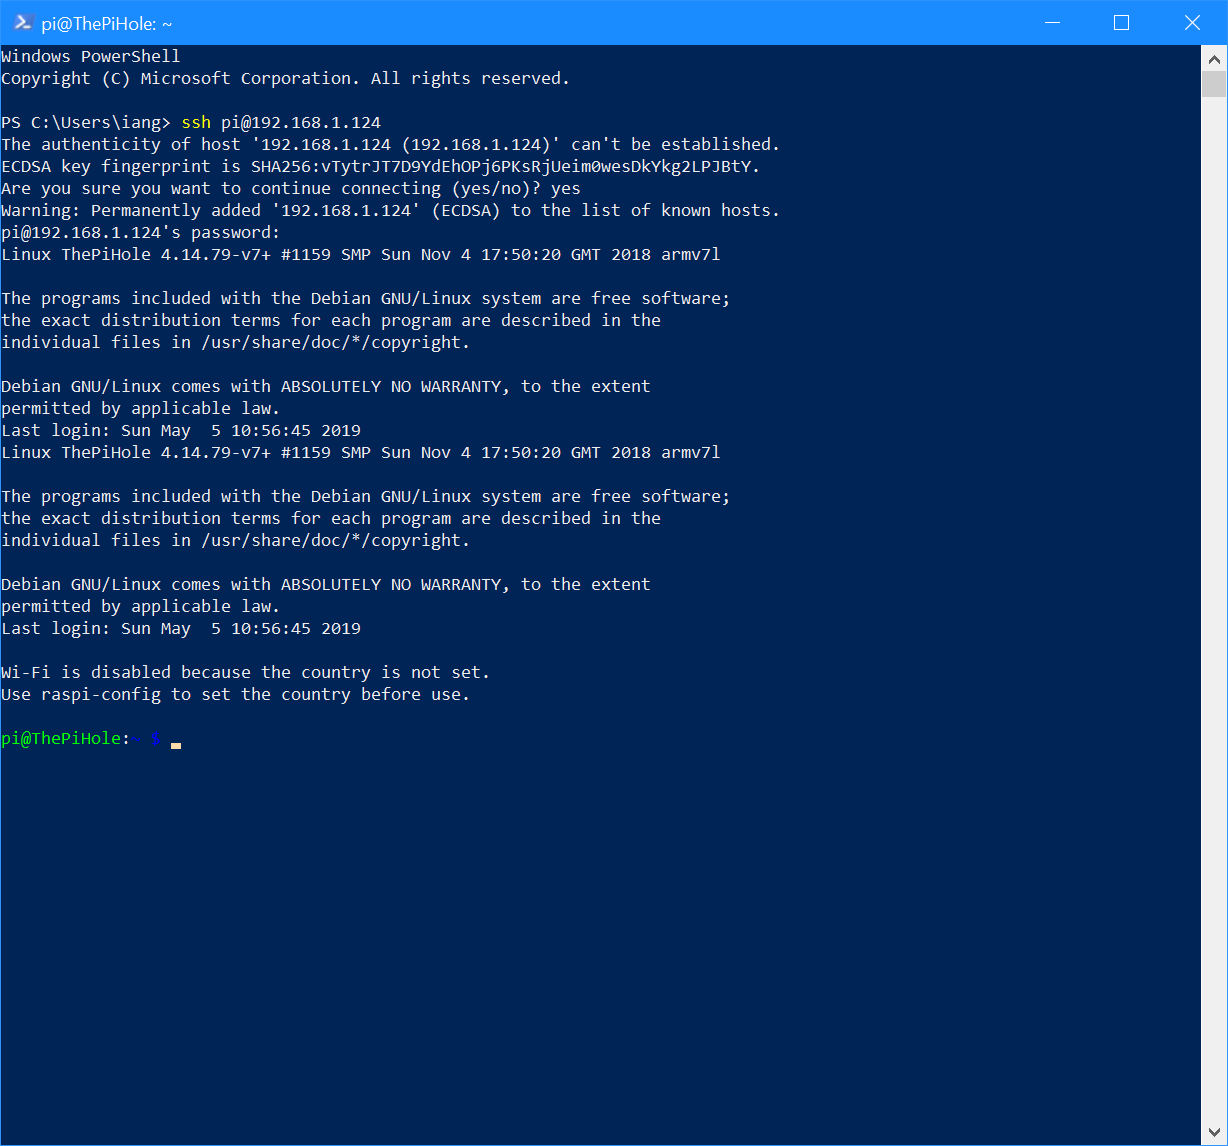
Step 3: Test SSH Locally
Before attempting to SSH into your Pi over the internet, test the connection locally to ensure SSH is working:
- Open a terminal on another device on the same network.
- Type
ssh pi@raspberry_pi_ip_addressand press Enter. - Enter the default password (
raspberry) when prompted.
Configuring Your Router for Remote Access
To SSH into your Raspberry Pi over the internet, you need to configure your router to forward incoming SSH traffic to your Pi. This process is known as port forwarding.
Step 1: Find Your Raspberry Pi’s Local IP Address
Before setting up port forwarding, identify your Raspberry Pi’s local IP address:
- Open a terminal on your Raspberry Pi.
- Type
hostname -Iand press Enter. - Note the IP address displayed (e.g.,
192.168.1.100).
Step 2: Access Your Router’s Admin Panel
Log in to your router’s admin panel using its IP address (commonly 192.168.1.1 or 192.168.0.1). Refer to your router’s manual for login credentials.
Step 3: Set Up Port Forwarding
Follow these steps to forward port 22 (default SSH port) to your Raspberry Pi:
- Navigate to the Port Forwarding section in your router’s admin panel.
- Create a new rule with the following settings:
- Service Name: SSH
- External Port: 22
- Internal IP Address: Your Raspberry Pi’s local IP address
- Internal Port: 22
- Protocol: TCP
- Save the rule and exit the admin panel.
Securing Your SSH Connection
While SSH is inherently secure, additional measures can enhance the safety of your connection. Here are some best practices:
Change the Default Password
The default password for the Raspberry Pi user is raspberry, which is well-known and vulnerable to brute-force attacks. Change it immediately:
- Open a terminal on your Raspberry Pi.
- Type
passwdand press Enter. - Follow the prompts to set a new password.
Use Key-Based Authentication
Key-based authentication is more secure than password-based authentication. Here’s how to set it up:
- Generate an SSH key pair on your local machine using
ssh-keygen. - Copy the public key to your Raspberry Pi using
ssh-copy-id pi@raspberry_pi_ip_address. - Disable password authentication by editing the SSH configuration file (
/etc/ssh/sshd_config) and settingPasswordAuthentication no.
Change the Default SSH Port
Changing the default SSH port (22) can reduce the risk of automated attacks:
- Edit the SSH configuration file (
/etc/ssh/sshd_config). - Change the line
Port 22to a different port number (e.g., 2222). - Restart the SSH service using
sudo systemctl restart ssh.
Using a Dynamic DNS Service
If your internet service provider assigns a dynamic IP address, you’ll need a Dynamic DNS (DDNS) service to map a domain name to your changing IP address.
Step 1: Choose a DDNS Provider
Popular DDNS providers include No-IP, Dynu, and DuckDNS. Sign up for an account and choose a domain name.
Step 2: Configure DDNS on Your Router
Most modern routers support DDNS. Follow these steps:
- Log in to your router’s admin panel.
- Navigate to the DDNS section.
- Enter your DDNS provider’s details and save the configuration.
Alternative Methods for Remote Access
If SSH over the internet seems too complex, consider these alternatives:
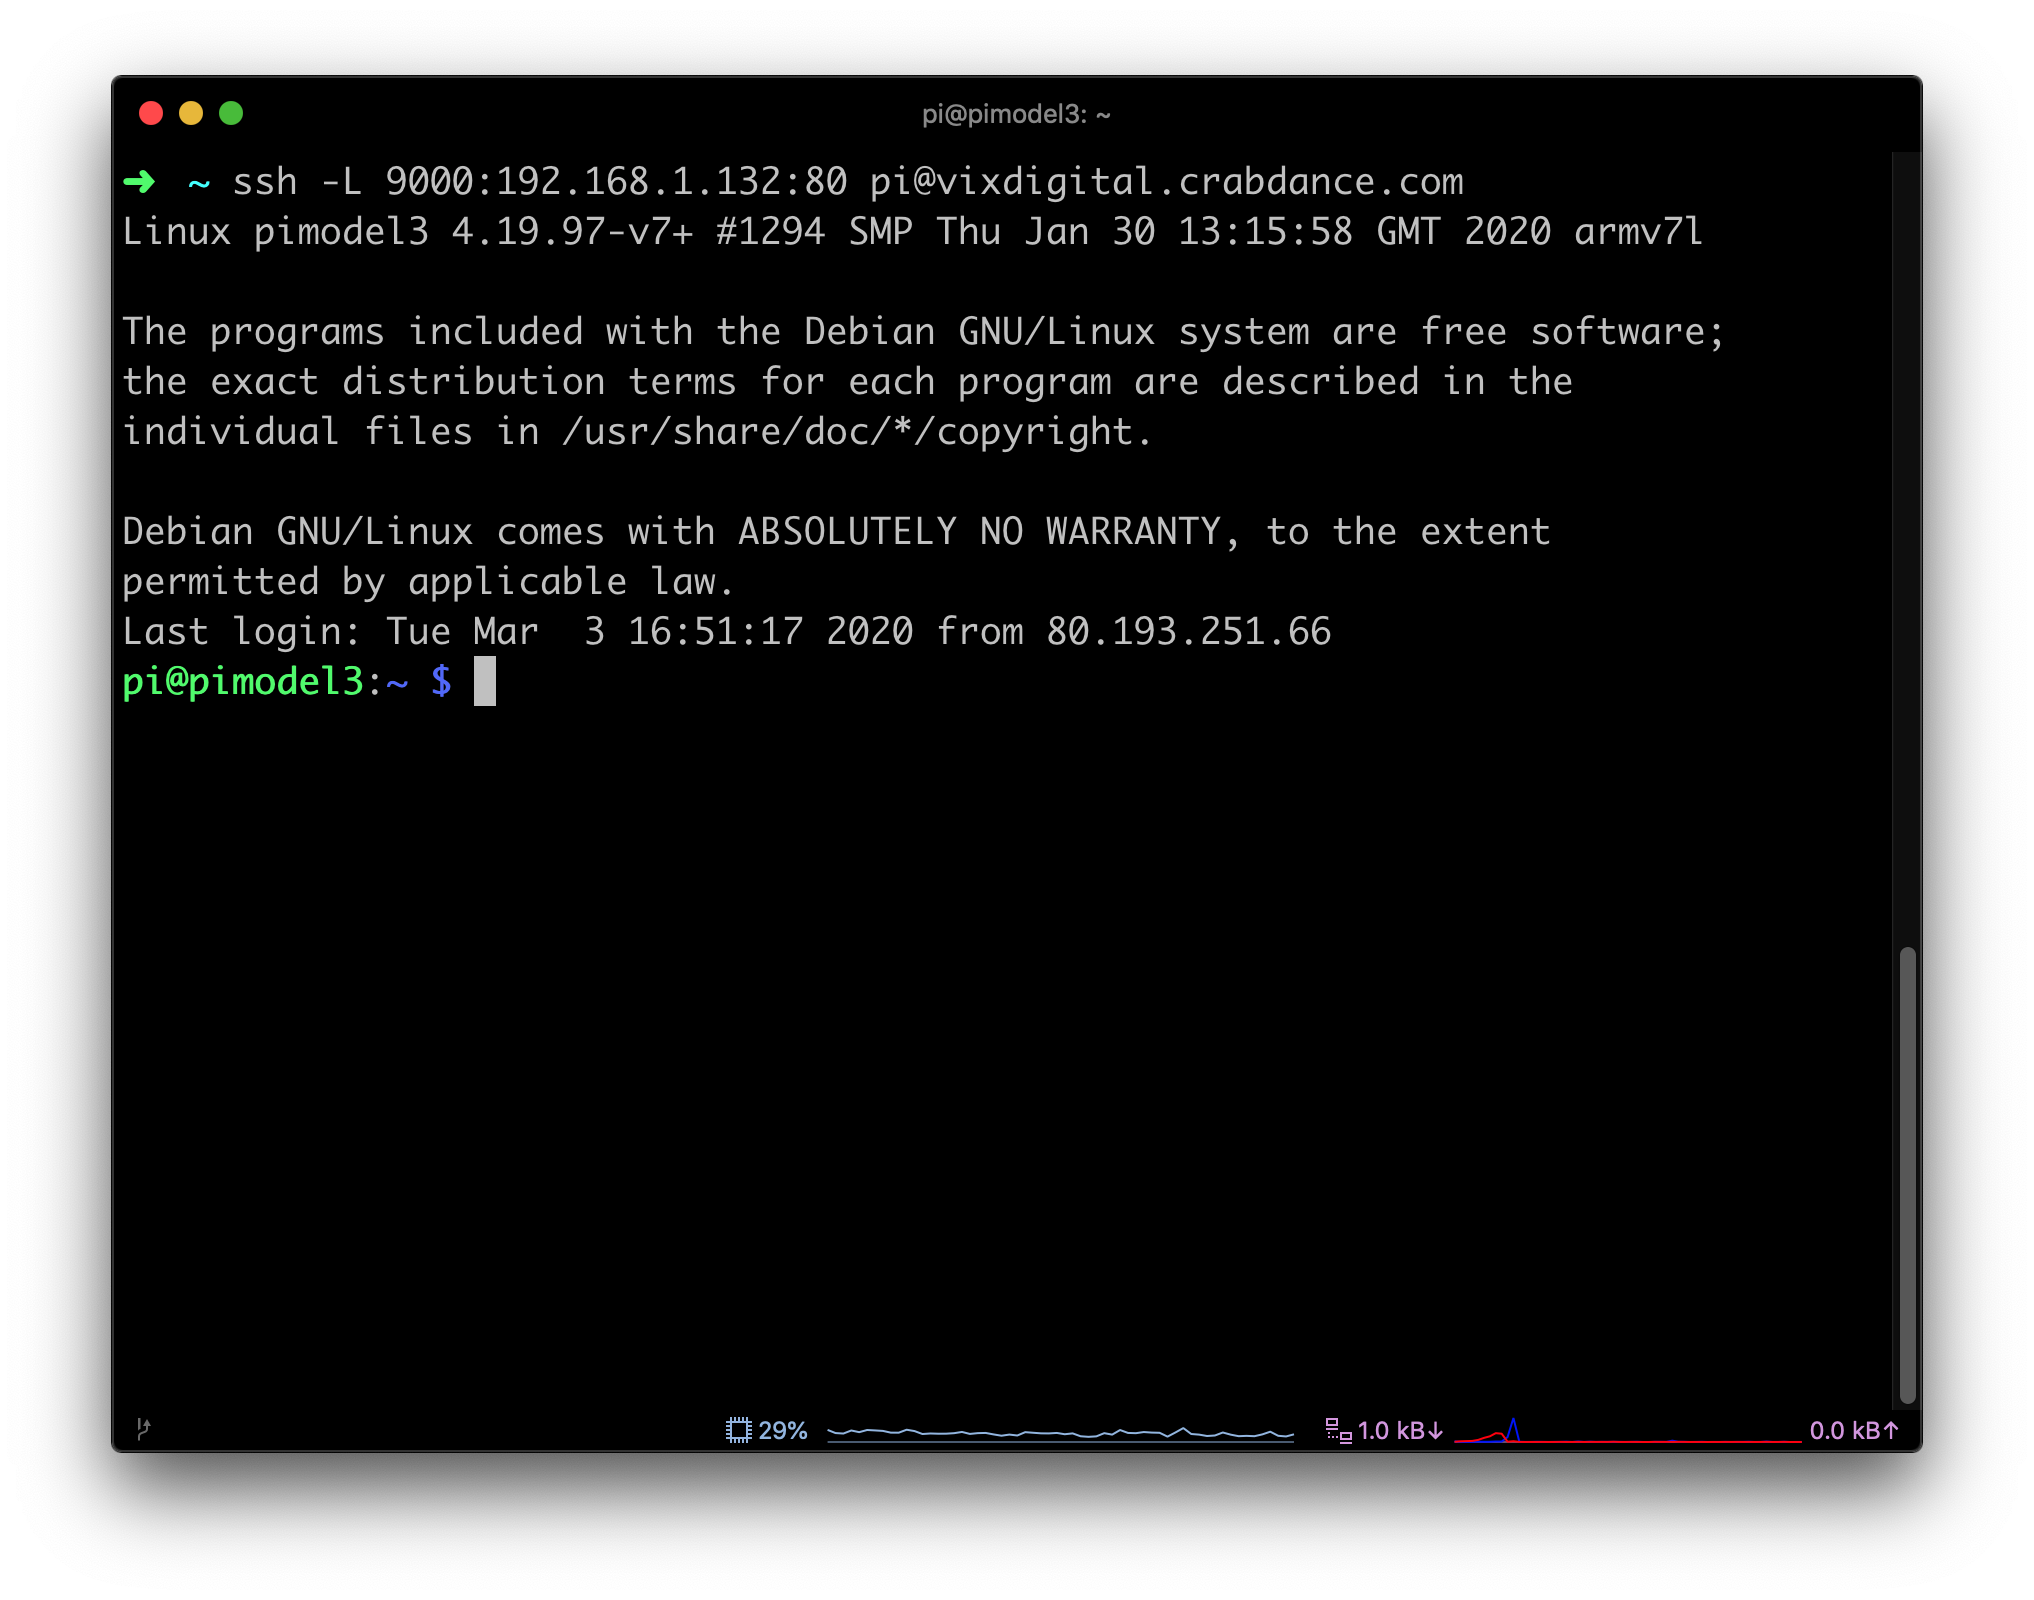
Reverse SSH Tunneling
Reverse SSH tunneling allows you to connect to your Raspberry Pi without configuring your router:
- Install an SSH client on your Raspberry Pi.
- Set up a reverse tunnel to a remote server using
ssh -R. - Connect to the remote server to access your Pi.
Cloud-Based Solutions
Services like ngrok and PageKite provide secure tunnels to your Raspberry Pi without requiring router configuration.
Common Issues and Troubleshooting
Here are some common issues you may encounter and how to resolve them:
- Connection Refused: Ensure SSH is enabled and the correct port is open on your router.
- Authentication Failed: Double-check your username, password, or SSH key.
- Timeout Error: Verify your Raspberry Pi’s IP address and network connectivity.
Best Practices for Remote Access
Follow these tips to maintain a secure and reliable remote access setup:
- Regularly update your Raspberry Pi’s software to patch vulnerabilities.
- Monitor your router’s logs for suspicious activity.
- Use a strong, unique password for your Pi and SSH key.
Conclusion
SSH into your Raspberry Pi over the internet is a powerful way to manage your device remotely. By following the steps outlined in this guide, you can establish a secure and reliable connection. Remember to prioritize security by using key-based authentication, changing the default password, and enabling a firewall. If you encounter any issues, refer to the troubleshooting section or consult online resources for additional support.
We hope this guide has been helpful in setting up remote access to your Raspberry Pi. If you have any questions or tips to share, feel free to leave a comment below. Don’t forget to share this article with others who might find it useful, and explore our other guides for more Raspberry Pi projects!
Article Recommendations
- Sharelle Rosado Age
- Matt Prokop Demi Lovato
- Best Remoteiot Behind Router For Raspberry Pi
- Caitlin Clark Europe Stats
- Remote Iot P2p Download
Detail Author:
- Name : Mrs. Alexandrine Kuhic
- Username : erica70
- Email : hprohaska@yahoo.com
- Birthdate : 1994-05-17
- Address : 329 Crawford Lodge Suite 811 West Ewaldland, MD 80412-3079
- Phone : (206) 648-8890
- Company : Thompson-Gerhold
- Job : Transportation Worker
- Bio : Et eveniet enim maiores. Ut sint qui ut rem numquam. Aut repellat modi qui aliquam consequuntur maxime nesciunt odit.
Socials
linkedin:
- url : https://linkedin.com/in/muriel.kutch
- username : muriel.kutch
- bio : Nam voluptatem error cum illo.
- followers : 2993
- following : 642
tiktok:
- url : https://tiktok.com/@muriel6368
- username : muriel6368
- bio : Dignissimos excepturi necessitatibus vel.
- followers : 5452
- following : 366
facebook:
- url : https://facebook.com/muriel.kutch
- username : muriel.kutch
- bio : Vel doloribus vero dolor ipsa accusantium iusto omnis.
- followers : 5159
- following : 28
instagram:
- url : https://instagram.com/mkutch
- username : mkutch
- bio : Vitae fugiat dolores et possimus beatae. Aut non mollitia animi odit nihil.
- followers : 5819
- following : 83
