
How To Connect Raspberry Pi SSH Over The Internet: A Comprehensive Guide
Connecting to your Raspberry Pi via SSH over the internet is a powerful way to remotely manage your device from anywhere in the world. Whether you're a hobbyist, a developer, or someone managing IoT devices, this guide will walk you through the steps to securely set up and use SSH for remote access. Raspberry Pi, with its versatility and affordability, has become a go-to device for many projects. However, accessing it securely over the internet requires careful configuration to avoid security risks.
Remote access to your Raspberry Pi can open up a world of possibilities, from managing servers to automating home systems. But before diving into the technical details, it’s important to understand the basics of SSH (Secure Shell) and how it works. SSH is a cryptographic network protocol that allows secure communication between two devices over an unsecured network. It ensures that your data remains encrypted and protected from unauthorized access.
This article will guide you step-by-step through the process of enabling SSH on your Raspberry Pi, configuring your network for internet access, and implementing security best practices. By the end of this guide, you’ll have a fully functional and secure SSH setup, allowing you to remotely manage your Raspberry Pi with confidence.
Table of Contents
Introduction to SSH
SSH, or Secure Shell, is a protocol used to securely access and manage devices over a network. It encrypts all data transmitted between the client and server, ensuring that sensitive information, such as login credentials, remains protected. SSH is widely used in server management, remote development, and IoT applications, making it a critical tool for anyone working with networked devices.
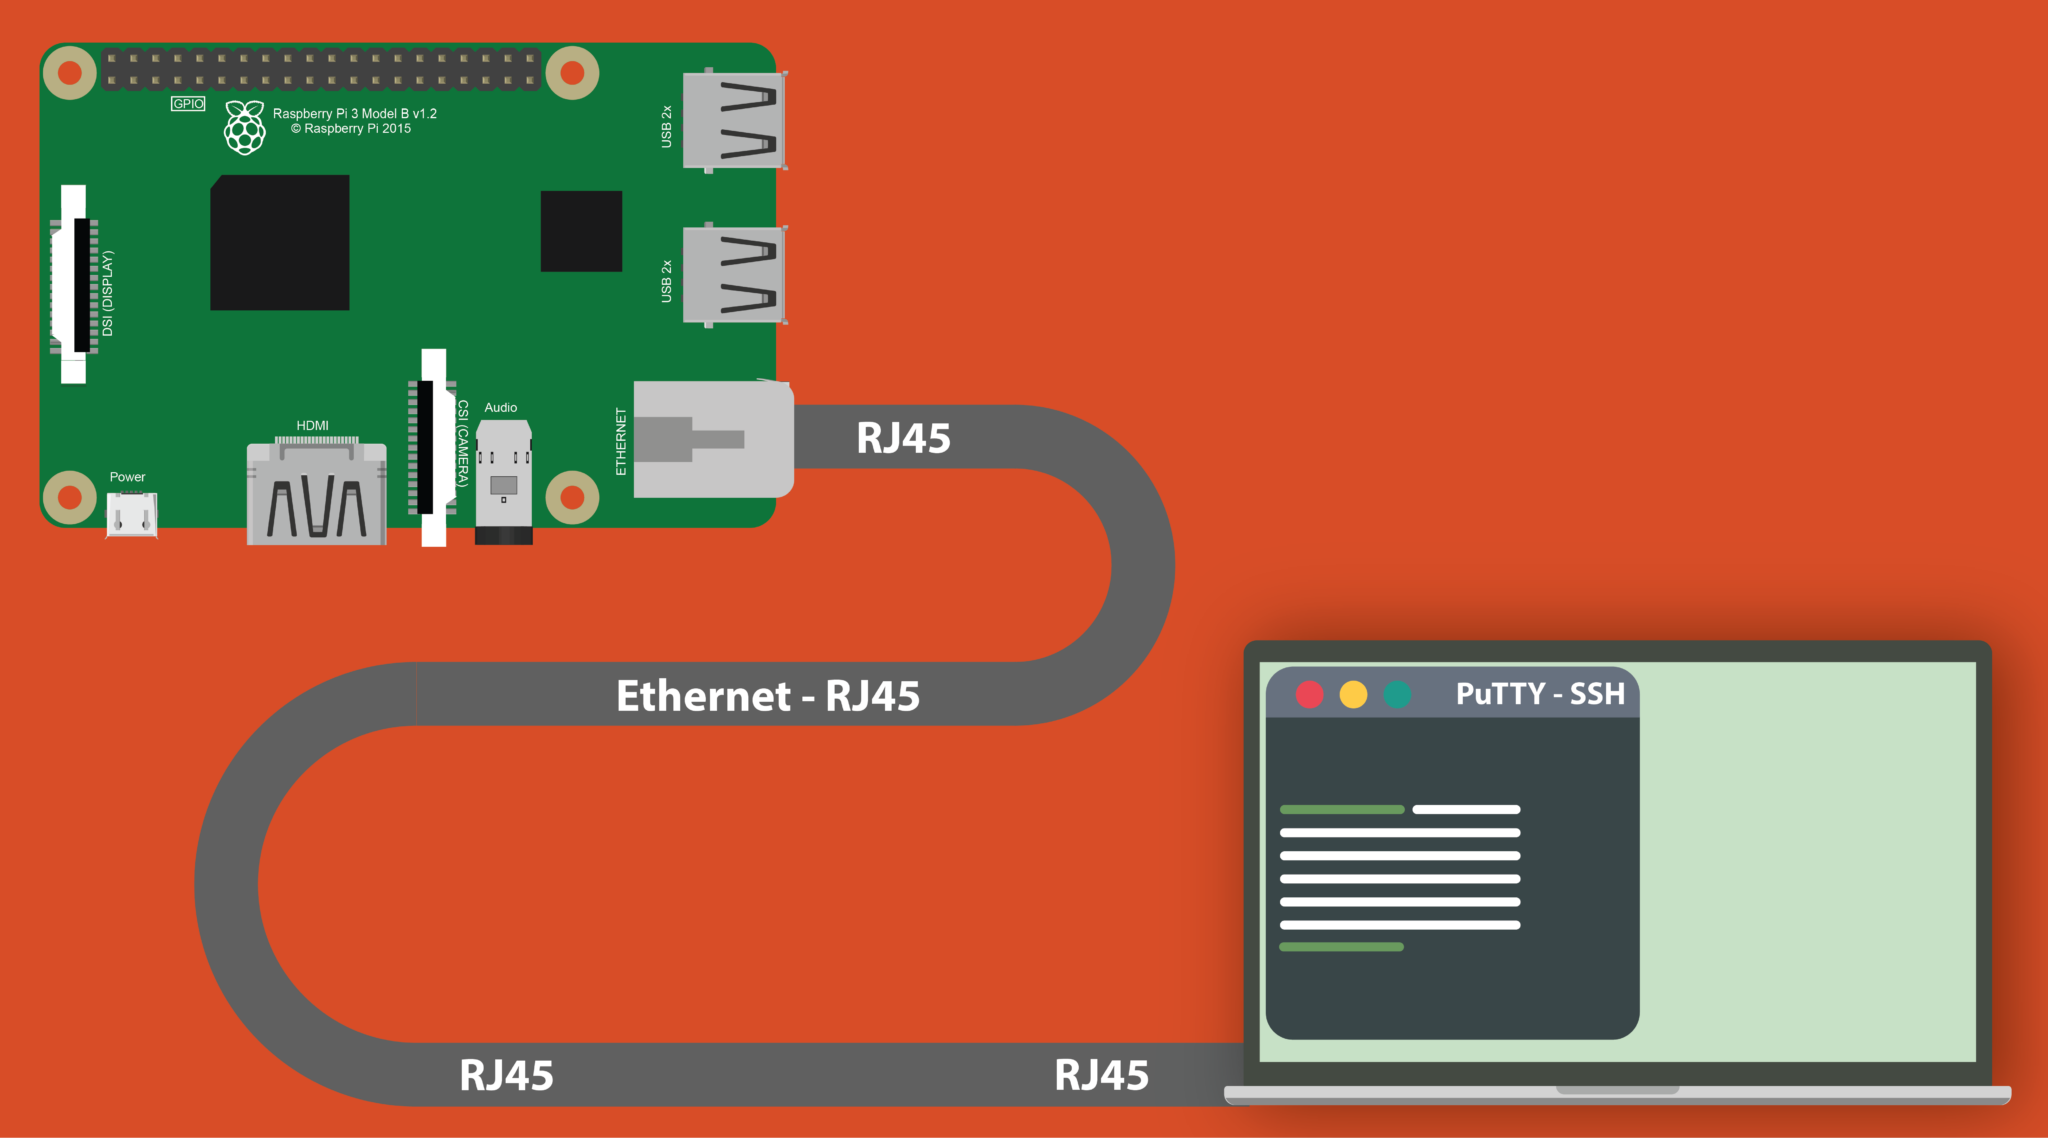
When it comes to Raspberry Pi, SSH allows you to remotely execute commands, transfer files, and manage configurations without needing physical access to the device. This is especially useful if your Raspberry Pi is located in a remote location or embedded in a project where direct access is inconvenient.
Before proceeding, ensure that your Raspberry Pi is running the latest version of its operating system (e.g., Raspberry Pi OS) and that it is connected to your local network. These prerequisites will ensure a smooth setup process.
- Courtney Richards
- Felix Drug Lord
- Best Remoteiot Behind Router For Raspberry Pi
- Yinleon Death
- Tate Mcrae Porm
Enabling SSH on Raspberry Pi
To connect to your Raspberry Pi via SSH, the first step is to enable the SSH service on the device. By default, SSH is disabled on Raspberry Pi OS for security reasons. Follow these steps to enable it:
- Connect a monitor, keyboard, and mouse to your Raspberry Pi.
- Open the Raspberry Pi Configuration tool by navigating to
Preferences > Raspberry Pi Configuration. - Go to the
Interfacestab and enable SSH. - Alternatively, you can enable SSH by creating an empty file named
sshin the boot partition of your Raspberry Pi’s SD card.
Once SSH is enabled, you can test the connection from another device on the same local network by using the command:
ssh pi@raspberrypi.localReplace pi with your username if you’ve changed it, and raspberrypi.local with the IP address of your Raspberry Pi if the hostname doesn’t resolve.
Configuring Your Network for Internet Access
To access your Raspberry Pi over the internet, you’ll need to configure your home network to allow external connections. This involves setting up port forwarding on your router and optionally using a Dynamic DNS (DDNS) service if your ISP assigns a dynamic IP address.
Start by logging into your router’s admin panel. This is usually accessible via a web browser by entering your router’s IP address (e.g., 192.168.1.1). Look for the section labeled Port Forwarding or NAT. Add a new rule to forward incoming traffic on port 22 (the default SSH port) to the local IP address of your Raspberry Pi.
Keep in mind that exposing port 22 to the internet can make your device vulnerable to brute-force attacks. To mitigate this risk, consider changing the default SSH port or using additional security measures, as discussed later in this guide.
Port Forwarding on Your Router
Port forwarding is a critical step in enabling SSH access over the internet. It allows external devices to connect to your Raspberry Pi by routing incoming traffic on a specific port to the local IP address of the device.
Here’s how to set up port forwarding:
- Access your router’s admin panel and navigate to the
Port Forwardingsection. - Create a new rule with the following details:
- External Port: 22 (or a custom port if you’ve changed it).
- Internal IP Address: The local IP address of your Raspberry Pi.
- Internal Port: 22.
- Protocol: TCP.
- Save the rule and restart your router if necessary.
After setting up port forwarding, you can test the connection from an external network by using your public IP address:
ssh pi@your-public-ipDynamic DNS Setup
If your ISP assigns a dynamic IP address, it can change periodically, making it difficult to connect to your Raspberry Pi using the public IP. A Dynamic DNS (DDNS) service resolves this issue by associating a domain name with your changing IP address.
Popular DDNS providers include No-IP, Dynu, and DuckDNS. To set up DDNS:
- Create an account with a DDNS provider and register a hostname (e.g.,
myraspberrypi.ddns.net). - Install the DDNS client on your Raspberry Pi or configure it on your router if supported.
- Update the DDNS settings with your public IP address periodically.
Once configured, you can use the DDNS hostname to connect to your Raspberry Pi:
ssh pi@myraspberrypi.ddns.netSecuring Your SSH Connection
Securing your SSH connection is crucial to protect your Raspberry Pi from unauthorized access. Here are some best practices to enhance security:
Changing the Default SSH Port
Changing the default SSH port (22) to a non-standard port can reduce the risk of automated attacks. To change the SSH port:
- Edit the SSH configuration file:
sudo nano /etc/ssh/sshd_config#Port 22 and change it to a custom port number (e.g., 2222).sudo systemctl restart sshDisabling Password Authentication
Password-based authentication is vulnerable to brute-force attacks. Instead, use SSH keys for authentication. To disable password authentication:
- Edit the SSH configuration file:
sudo nano /etc/ssh/sshd_configPasswordAuthentication no PermitRootLogin nosudo systemctl restart sshUsing SSH Keys for Authentication
SSH keys provide a more secure and convenient way to authenticate compared to passwords. To generate and use SSH keys:
- On your local machine, generate an SSH key pair:
ssh-keygen -t rsa -b 4096ssh-copy-id pi@raspberrypi.localssh -i ~/.ssh/id_rsa pi@raspberrypi.localTesting Your SSH Connection
After completing the setup, it’s important to test your SSH connection from an external network. Use the following steps:
- Find your public IP address using a service like WhatIsMyIP.
- Connect to your Raspberry Pi using the public IP or DDNS hostname:
ssh pi@your-public-ipIf the connection is successful, you’ve successfully configured SSH access over the internet.
Common Issues and Troubleshooting
Here are some common issues you might encounter and their solutions:
- Connection Refused: Ensure that SSH is enabled on your Raspberry Pi and that port forwarding is correctly configured.
- Timeout Error: Verify that your firewall or ISP isn’t blocking the SSH port.
- Authentication Failed: Double-check your SSH key or password and ensure that the correct permissions are set.
If you’re still experiencing issues, consult your router’s documentation or seek help from online forums like the Raspberry Pi community.
Conclusion
Connecting to your Raspberry Pi via SSH over the internet is a powerful way to manage your device remotely. By following the steps outlined in this guide, you can securely configure your Raspberry Pi for remote access while minimizing security risks. Remember to implement best practices such as changing the default SSH port, disabling password authentication, and using SSH keys.
Now that you’ve successfully set up SSH access, why not explore other possibilities with your Raspberry Pi? Share your experience in the comments below or check out our other articles for more tips and tutorials. Happy tinkering!
Article Recommendations

Detail Author:
- Name : Maye Leffler
- Username : vesta.von
- Email : lexi67@rutherford.com
- Birthdate : 1976-01-17
- Address : 846 Grady Port Suite 751 East Albert, AL 79767-8701
- Phone : 1-747-354-6934
- Company : Goyette PLC
- Job : Plating Operator
- Bio : Excepturi voluptatem aperiam molestias dolorem et nesciunt. Assumenda magni quas aperiam nemo officia saepe. Perspiciatis veniam ducimus nulla pariatur doloribus.
Socials
linkedin:
- url : https://linkedin.com/in/kshlerint
- username : kshlerint
- bio : Aliquam voluptas et similique aut molestiae.
- followers : 4541
- following : 2548
tiktok:
- url : https://tiktok.com/@tad_official
- username : tad_official
- bio : Et recusandae nihil exercitationem ipsam.
- followers : 5559
- following : 2720
twitter:
- url : https://twitter.com/tkshlerin
- username : tkshlerin
- bio : Quam reprehenderit dolor nemo dolorem non. Et quia laudantium in qui architecto inventore. Nobis debitis rerum ipsa dolor.
- followers : 6272
- following : 2038
instagram:
- url : https://instagram.com/tad_kshlerin
- username : tad_kshlerin
- bio : Provident qui tempore molestias aut debitis dolores qui. Ipsa accusamus non ipsa et non officia.
- followers : 2467
- following : 215
facebook:
- url : https://facebook.com/tad.kshlerin
- username : tad.kshlerin
- bio : Quas eos laboriosam reiciendis aliquam. Accusamus sed nulla et placeat earum.
- followers : 2422
- following : 1168
